
Post by grandpawrichard on Mar 7, 2006 8:31:15 GMT -7
Tying Serving Knots for Installing Accessories (for the internet)
Quite a few people have asked me what my favorite method for tying in peep sights, Dropaway Cords and Nocking points is.
I have found a simple little knot that works Tremendously and if tied with enough tension will not move on it’s own. It is also quite hard to slide if you need to move it, but it is possible to reposition the knot.
To start with, I decide how big of a knot I want to tie, so I can cut off enough serving material to do the job without much waste.
In this set of instructions I will instruct with both words and photos, so that I am easily understood.
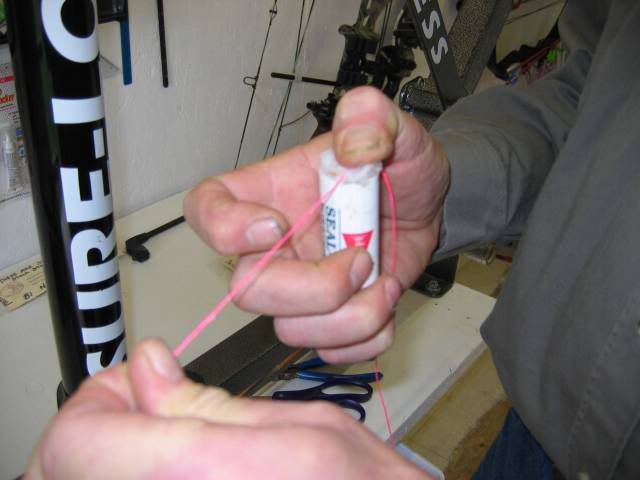
Step 1: Cut off a 10"To 16" piece of serving material.

Step 2. Wax Material with Tex-tite wax or another sticky feeling wax like Beeswax..
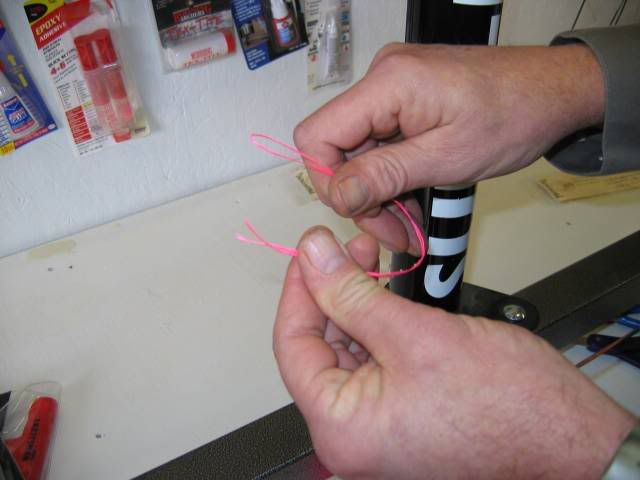
Step 3. Put both ends together to form a shorter, but doubled material with a loop on one end.
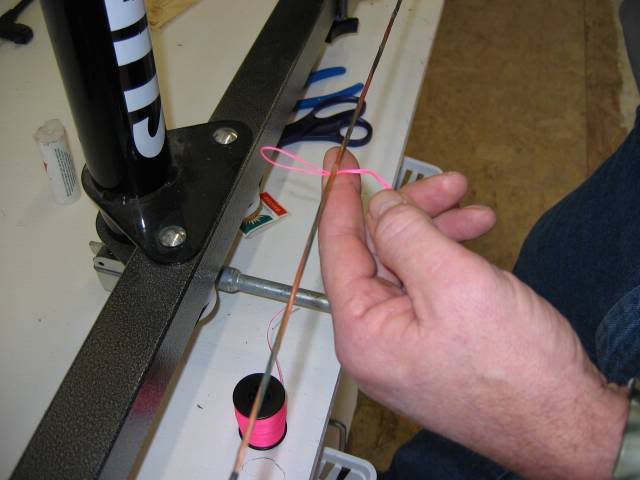
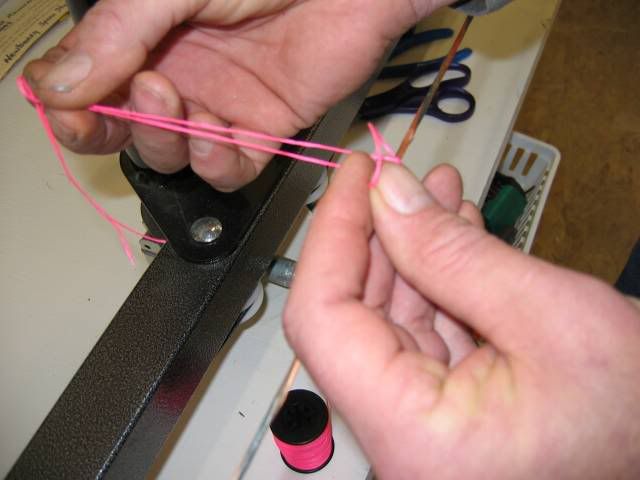
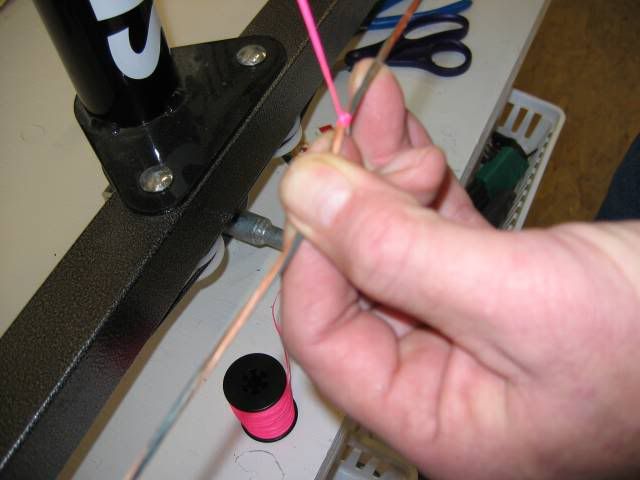
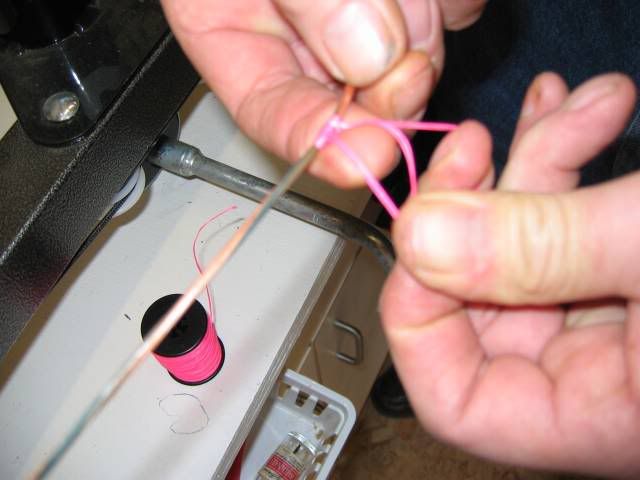
Step 4: put the knot end Under the string and bend the open loop upwards.
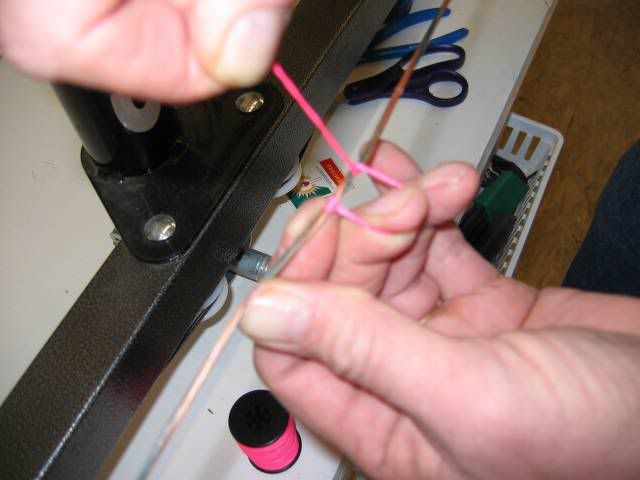
Step 5: Feed the loose ends of the material through the loop and pull as tight as you can.
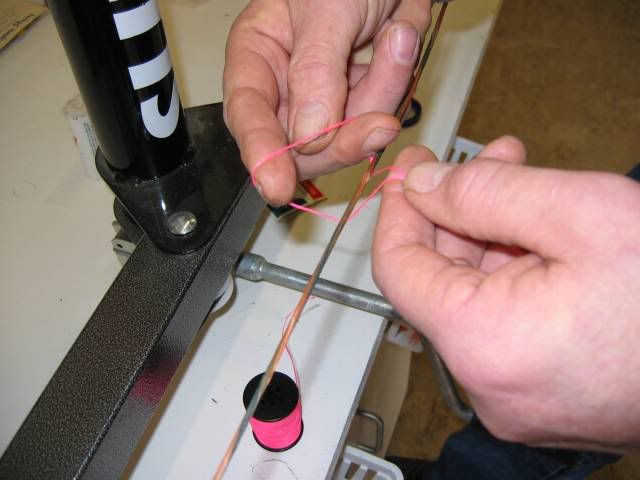
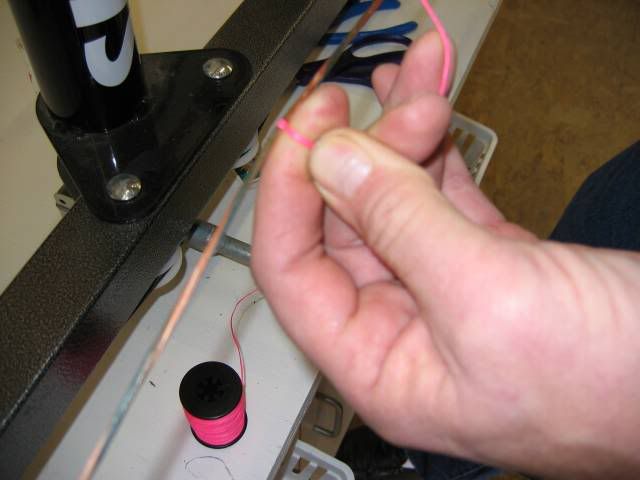
Step 6: Feed the Loose ends of the serving material Through the Loop.
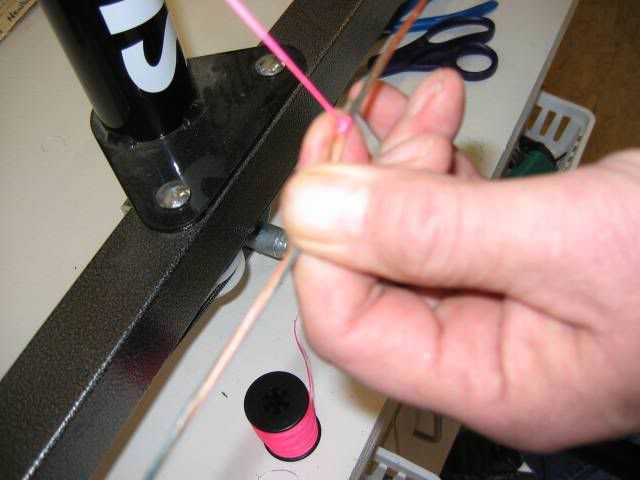
Step 7: Pull the knot as tight as possible to form the first of a series of knots. Remember Keep all knots as TIGHT AS POSSIBLE.

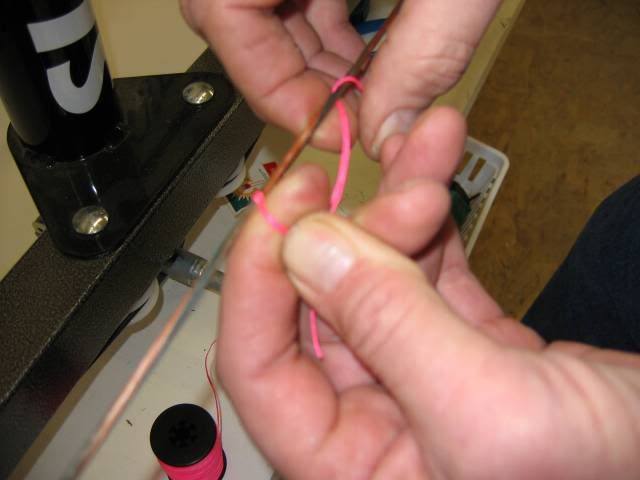
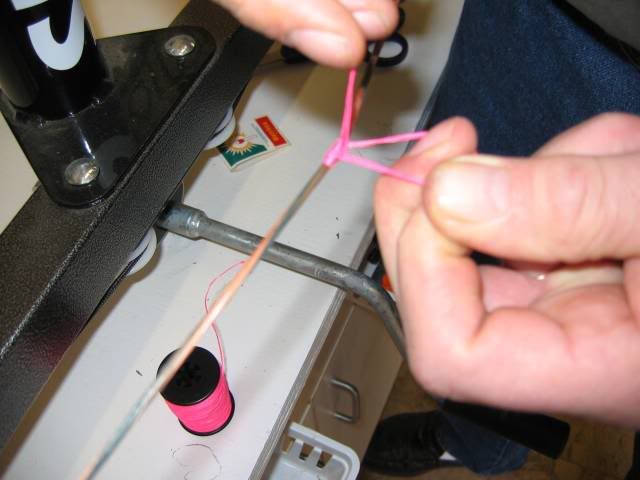
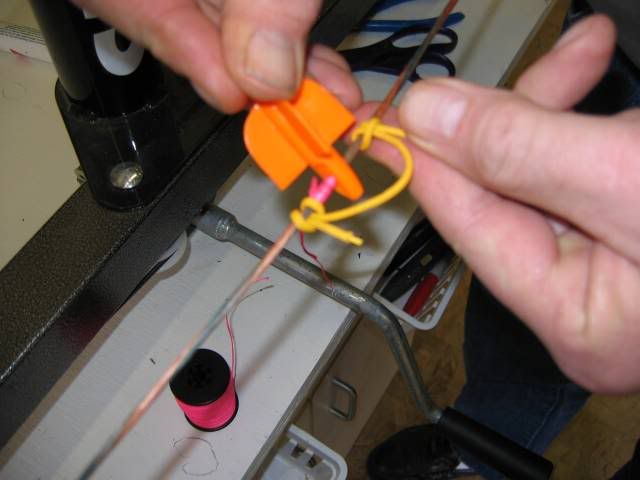
Step 8: Holding as much tension as possible, start forming the next knot in the series.
Step 9: Feed loose ends of the material through the loop formed between your hands.
Step 10: Holding extreme Tension, pull the loose ends and slide them up tight to the first knot.
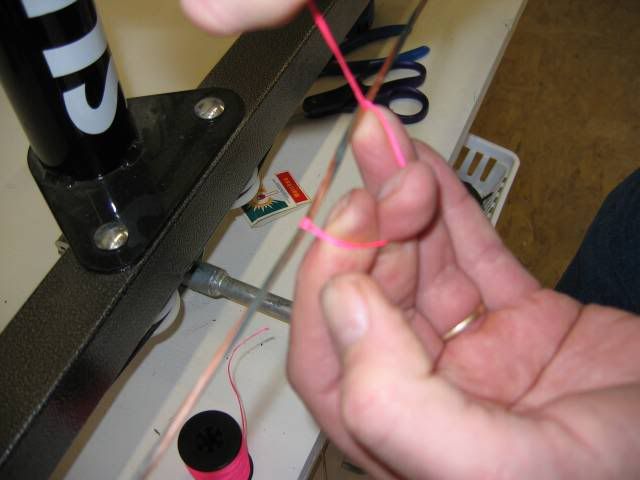
Step 11: Pull knot as tight as possible and up tight as possible to the first knot.
Step 12: Extreme tension is the clue to building a good knot for serving in items.
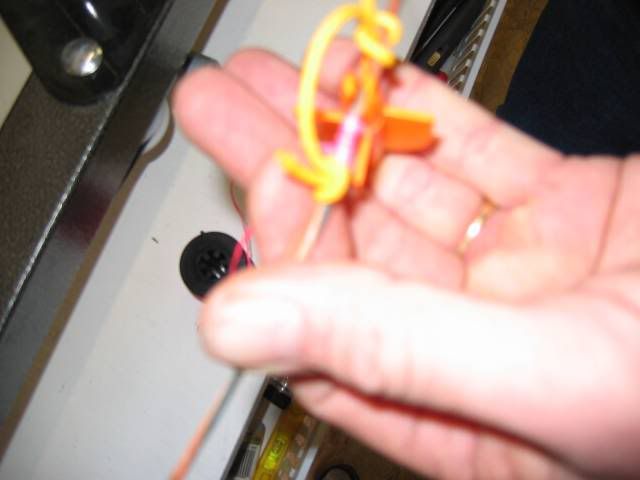
Step 13: Keep tying knots side by side until you reach your desired length for your serving knot. If you are tying in a peep sight or a dropaway cord you can now finish the series off with a square knot.
Then you CAREFULLY with a wooden match melt the loose ends of material to a little ball, which bonds everything together so it can’t come untied.
Step 14: My length has been reached, so I am ready to now start building the height I need for a nocking point in this case.

Step 15: So now I start tying another series of knots on top of my first set, but I tie them in the opposite direction. I go from right to left.
Step 16: Keeping constant tension on the material is key to tying a knot that will not slip by accident.
Step 17: Continue tying Tight knots until you get to the starting point. This is where you put a loose nock on the string to check the nock height.
Step 18: If you do not need to go any higher than these two layers you finish the nocking point knots by tying a square knot in the material.
Step 19: Then you CAREFULLY with a wooden match melt the loose ends of material to a little ball, which bonds everything together so it can’t come untied.
It’s as simple as that to tie on accessories!
Written by Richard M. (Dick) Raymond Jr.
Also know in the internet archery Forums as: grandpawrichard or GPR
March 5, 2006
Quite a few people have asked me what my favorite method for tying in peep sights, Dropaway Cords and Nocking points is.
I have found a simple little knot that works Tremendously and if tied with enough tension will not move on it’s own. It is also quite hard to slide if you need to move it, but it is possible to reposition the knot.
To start with, I decide how big of a knot I want to tie, so I can cut off enough serving material to do the job without much waste.
In this set of instructions I will instruct with both words and photos, so that I am easily understood.
Step 1: Cut off a 10"To 16" piece of serving material.
Step 2. Wax Material with Tex-tite wax or another sticky feeling wax like Beeswax..
Step 3. Put both ends together to form a shorter, but doubled material with a loop on one end.
Step 4: put the knot end Under the string and bend the open loop upwards.
Step 5: Feed the loose ends of the material through the loop and pull as tight as you can.
Step 6: Feed the Loose ends of the serving material Through the Loop.
Step 7: Pull the knot as tight as possible to form the first of a series of knots. Remember Keep all knots as TIGHT AS POSSIBLE.
Step 8: Holding as much tension as possible, start forming the next knot in the series.
Step 9: Feed loose ends of the material through the loop formed between your hands.
Step 10: Holding extreme Tension, pull the loose ends and slide them up tight to the first knot.
Step 11: Pull knot as tight as possible and up tight as possible to the first knot.
Step 12: Extreme tension is the clue to building a good knot for serving in items.
Step 13: Keep tying knots side by side until you reach your desired length for your serving knot. If you are tying in a peep sight or a dropaway cord you can now finish the series off with a square knot.
Then you CAREFULLY with a wooden match melt the loose ends of material to a little ball, which bonds everything together so it can’t come untied.
Step 14: My length has been reached, so I am ready to now start building the height I need for a nocking point in this case.
Step 15: So now I start tying another series of knots on top of my first set, but I tie them in the opposite direction. I go from right to left.
Step 16: Keeping constant tension on the material is key to tying a knot that will not slip by accident.
Step 17: Continue tying Tight knots until you get to the starting point. This is where you put a loose nock on the string to check the nock height.
Step 18: If you do not need to go any higher than these two layers you finish the nocking point knots by tying a square knot in the material.
Step 19: Then you CAREFULLY with a wooden match melt the loose ends of material to a little ball, which bonds everything together so it can’t come untied.
It’s as simple as that to tie on accessories!
Written by Richard M. (Dick) Raymond Jr.
Also know in the internet archery Forums as: grandpawrichard or GPR
March 5, 2006

